Monday, January 31, 2011

Hot Sauce

Hot Sauce

Last week I saw a blog post about this guy's attempt at making hot sauce. Me being a foodie and a HUGE fan of spicy food I immediately decided that this was something that I needed, no required to do. Let me start this by saying I probably hace 10-20 different bottles of hot sauce in my posession. I literally have 3 different sauces in my desk at work. When I have pho it will have a red hue when I am done putting sriracha in it. I have been putting Tabasco sauce on just about everything for as long as I can remember. I determined that making this unknown sauce was my new calling and I needed to make it happen.

So I started poking around the internets and found that it is way easier than expected. All you really do is take some peppers, boil then they blend them up with some form of liquid. That was actually the hardest part of the whole process was deciding what kind of peppers and liquid to use. I knew I wanted it hot so I immediately chose habenaros for my peppers. Then when I went to my awesome local grocery store I discovered they had a ton of these little Thai green chilies that are compareably to their orange cousins. I bought some and a ton of habenaroes and you should have seen the look on the checker's face when he weighed them. Then the second decision was upon me, what kind of liquid to use. So I started looking at all the hot sauces I have in my pantry and I noticed a trend, the first ingredient is usually vinegar. Bam decision made.

I then started making it and let me tell you it was an interesting experience. When I was boiling them I literally was coughing because of the hot, humid conditions it was creating in my kitchen. There was coughing, sneezing and even some tears and I hadn't even put it all together yet. Thankfully the wife was asleep because I probably would have been cooking this on the camp stove in the garage. I finally got it all done and put into containers. I then tried it and discovered that it was insanely hot. I had my above mentioned chosen one try some on a pot sticker and it literally took her breath away.

My battle wasn't over yet though. I was then left with one major decision, what to name it. So please if you have any suggestions please leave me a comment below I would really appreciate it.

Kitchen Notes
* Be VERY careful when making this. These peppers will remove paint from your wall so if you get any of it in your eyes or something, you are going to pay for it.
* Any kitchen tool you use in this recipe will need to be cleaned with bleach to kill the heat.
* You can use any peppers you want to I just wanted it really hot and habenaroes and Thai chilies definitely did the trick.
* You can use any sort of liquid you want like ketchup, tomato paste, water. I used vinegar because I wanted that extra bite.

Ingredients
- 20 habenaro peppers, stem removed
- 30 Thai chilies, stem removed
- 1 small onion, diced
- 3 carrots peeled and roughly chopped
- 2 cloves garlic, skin removed
- 2 tablespoons kosher salt, divided
- 1/2 - 1 cup white vinegar

The Process
1. In a medium sauce pot add the peppers, onion, carrots, garlic and 1 tablespoon of salt and enough water to cover them then place over high heat on the stove. Boil for 20 minutes then drain off liquid.
2. Add the peppers and veggies to a blender and purree. Start adding vinegar until you get the consistency you are looking for. Season with remaining tablespoon of salt then place in jars in the fridge.
3. Enjoy sparingly on anything that needs a little heat.

Thursday, January 27, 2011

Swedish Meatballs

Swedish Meatballs

Swedish Meatballs

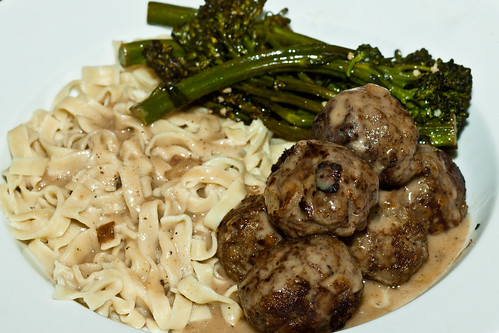
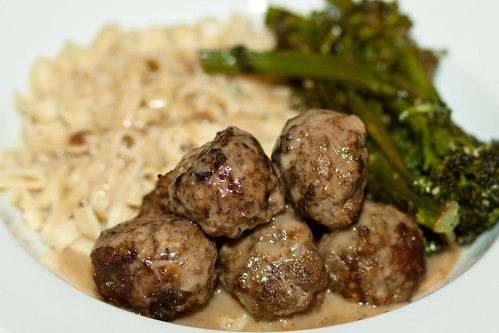
You know the only thing that sucks about this dish? That I didn't have it for the first time until I was 26 years old. A friend of ours who lived in the same building as us was having a birthday. Her family all lived in Atlanta so she was kind of flying solo on a work night. So we asked her what she would like for birthday dinner and she said she wanted Swedish Meatballs. I immediately said done, see you at 7. I then realized that I have never made or even eaten these before.

So I did what I always do and that is start doing research. Usually the first thing I do is go to FoodNetwork.com and look at Alton Brown's recipes. This dude dedicates whole shows to one dish and this being a hugely popular dish I figured that he might have done one for these balls of joy. Guess what I was right.

So my dish is a slight variation from the from Alton Brown's recipe found here. If you have never had these they are super good and easy to make. The flavor is awesome with just a slight spice that makes them unique. Trust me you want to eat these.

Kitchen Notes
* You can use bread crumbs if you'd like instead of milk soaked bread.
* You can serve these over potatoes or rice.
* Makes 4 servings.

Ingredients
- 2 slices white bread torn into pieces
- 1/4 cup milk
- 3 tablespoons clarified butter, divided
- 1/2 onion dices small
- 1 teaspoon kosher salt
- 1 & 1/2 pounds ground beef
- 2 large egg yolks
- 1/2 teaspoon pepper
- 1/4 teaspoon ground allspice
- 1/4 teaspoon freshly grated nutmeg
- 1/4 cup flour
- 4 cups beef broth
- 6 tablespoons heavy cream

The Process
1. In a bowl combine the bread and the 1/4 cup of milk and stir until the milk is absorbed. Set aside.
2. In a medium saute pan add the 1 tablespoon of the butter and the onions over medium heat and cook the onions until translucent about 8 minutes. Remove from heat and set in a thin layer on a plate to cool.
3. In a large bowl combine the soaked bread, salt, beef, egg yolks, pepper, allspice, nutmeg and the cooled onions then mix well. Form into balls a little bit smaller than the size of a golf ball.
4. In a large cast iron skillet heat the remaining 2 tablespoons of butter over medium heat. Add the meat balls in batches and brown all sides. Remove the meatballs as they are done and add the remaining ones until they are all done. Place on a sheet pan in the oven on low to keep warm.
5. Reduce the pan's heat to medium low and add the flour. Whisk to make sure it doesn't stick to the pan. Stir in the beef stock slowly and bring to a simmer.
6. Add the cream and cook until you get your desired consistency. Serve over noodles.
7. Enjoy!

Tuesday, January 25, 2011

Finally

I have been aching to take some pictures. As of late with work and family life I haven't really had the opportunity to get out and shoot. That was until last weekend when I got to do a number of cool things.

Lilly

First was when we took our dog, Lilly, to the park to let her run around. I don't know how much you know about Labs but they are pure energy and are the greatest fetchers in the K-9 world. She proceeded to get insanely filthy but still have a ton of fun and burn off tons of steam.

Corey

That night was my good friend (and no he's not my brother) Corey's Thirty-One-Derful birthday celebration in Seattle. It was awesome. We had this room rented out and tons of people were there. His brother DJ'ed and Rory OK and the Worst Band Ever played and rocked the house. It was too much fun and ended in a long Sunday morning.

Jeremy

Then on Sunday we had the opportunity to see our friend Jeremy play murder ball in West Seattle. The sport itself is simple but the overall way they play is complex. I had no idea it was that cool but I do now.

So check out the links below to see all the pictures and leave some comments if you like. Thanks everyone for having a gander I appreciate it.

The Park With My Family
Corey's Birthday Party
Seattle Slam

Friday, January 21, 2011

Chicken Carbonara

Chicken Carbonara

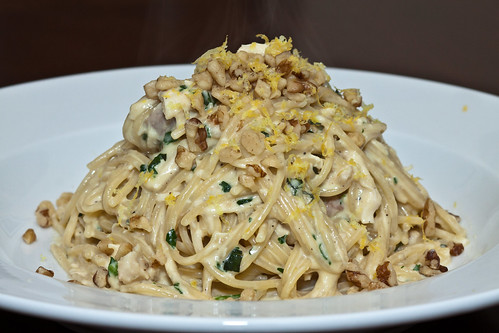
Chicken Carbonara is a dish that I've probably had 1 time in my entire life short of last night. It was at Buca Di Beppo for my birthday last year when my first experience with this dish happened and it was blissful to say the least. So when I was researching dishes I wanted to make and this one came up, I was all over it. I quickly realized that it is a very simple meal to make and is filling and rich to the last bite. If you are looking for a meal that will really impress your friends and is too good for words, this is your deal. If you have any questions please let me know I am always here to help.

Kitchen Notes
* If you cant find pancetta you can use bacon.
* The walnuts and lemon zest are optional but the are really good. They add a nice zing and a crunch.
* Makes 4 good sized servings.

Ingredients
- 1 pound spaghetti
- 1 tablespoon olive oil
- 4 ounces pancetta diced
- 3 cloves garlic, minced
- 1 whole roasted chicken, meat shredded
- 8 egg yolks
- 2 1/2 cups heavy cream
- 1 cup parmesan cheese
- 1/4 cup italian parsley chopped
- 1/4 cup basil chopped
- 1 lemon zested
- 1/2 cup walnuts, chopped

The Process
1. In a large pot heat water, salt and a little bit of olive oil to boil the noodles. When the water starts to boil add the the noodles and boil for 10 minutes and cook until al dente.
2. The same time you start the noodles start another large pot to the stove over medium high heat and add the oil, pancetta and garlic and cook until browned. Add the chicken and stir to combine everything. Meanwhile whisk together the egg yolks, cream, parmesan parsley and basil.
3. Right about now the noodles should be done. Turn your pan down to to medium low (this is very important). Drain the noodles and add the pot that has the chicken and pancetta in it. Then add the egg and cream mixture to the pot and stir like crazy. The idea is to heat the sauce through but not to cook the eggs. If it starts simmering you will have scrambled eggs and that is no good. Continue stirring with tongs and a spoon until the sauce thickens. You're done.
4. To plate serve in nested stacks then garnish with the lemon zest and walnuts. Trust me it's good.
5. Enjoy!

Wednesday, January 19, 2011

7 Flavor Beef

7 Flavor Beef

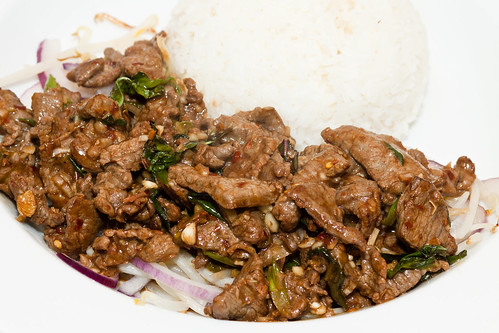
When my wife was out of town I knew that it was time to eat some form of beef. She doesn't really eat steak of I have to take advantage when she's not around to indulge in that form of protein. I went though my list of things I wanted to make and say that I wrote down 7 Flavor Beef. It was on. So I stated doing research and found a couple different recipes that would work one of which claimed to be Wild Ginger's recipe. So I did a little combining and this is what I came up with. It is really killer and I hope you all like it.

Kitchen Notes
* You can use chicken or pork or whatever you want.
* The peanuts are optional I just liked the crunch.
* If you can't find Thai basil you can use regular.
* Makes 4 good sized servings.

Ingredients
- 1 pound tri-tip thinly sliced
- 1 tablespoon minced lemongrass
- 1 teaspoon soy sauce
- 1/2 inch ginger minced
- 2 teaspoons garlic minced
- 1 teaspoon dried red chili pepper flakes
- 1/2 teaspoon fish sauce
- 1/2 teaspoon sesame oil
- 1/2 teaspoon honey
- 1 teaspoon Chinese five spice powder
- 2 teaspoons kosher salt
- 1 tablespoons peanut oil
- 1/2 red onion thinly sliced
- 1/2 green onions sliced
- 1 cup bean sprouts
- 3 tablespoons hoisin sauce
- 1 tablespoon ground peanuts
- 20 leaves Thai basil
- white rice for serving

The Process
1. Combine the beef, lemon grass, soy sauce, ginger, garlic, pepper flakes, fish sauce, sesame oil, honey, 5-spice and salt in a bowl and mix well. Place in the fridge for 1 hour to allow to marinade.
2. In a large wok add the peanut oil over high heat. Add the red onion, green onion and sprouts and cook for about 2 minutes. Remove from the wok and set on a serving plate.
3. Return the work to the heat and add the beef and cook on high until you start to see the meat turning brown about 3 minutes. Add the hoison sauce, peanuts and basil and cook for an additional 2 minutes or until the meat is medium. Remove from heat and set on top of the veggies. Serve with white rice.
4. Enjoy!

Reference Recipe

Thursday, January 13, 2011

Korean Fried Chicken

KFC

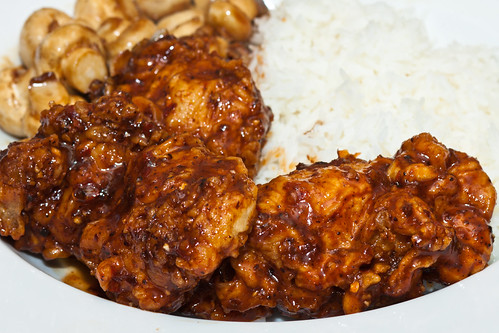
When I was in Hawaii I had this called Korean chicken. It basically consists of super crispy chicken smothered in a very tasty sauce. So when I came home I knew this was one of those dishes I was going to have to make. So I found this recipe and finally got to make it last night. Let me tell you it was amazing. Now I am not going to lie it wasn't what I was expecting but it was very tasty none the less. I think that there is a Hawaiin version that would probably be the same thing just with a different sauce. When I find a recupe for that I will be making that too. I am still very happy with the results. The chicken was crispy and moist inside and the sauce was spicy and savory.

Here's the recipe for Korean Fried Chicken which was adapted from this recipe from Ellie on AlmostBourdain.BlogSpot.com. Hope you all like it.
http://almostbourdain.blogspot.com/2010/10/kfc-korean-fried-chicken.html

Kitchen Notes
* The gochujang is an ingredient you will probably only find in a korean grocery store. This sauce is comprised of chilis and fermented soy beans which I was able to find at this awesome grocery store I shop at. The beans were still whole thus the reason I ran it through a food processor.
* I used boneless skinless chicken thighs for my recipe but the original calls for chicken wings which would have been awesome as well.
* Makes 4 servings

Ingredients
- 8 boneless skinless chicken thighs
- 1 & 1/4 cup flour
- 2 egg whites
- 1 teaspoon salt
- 1 & 1/2 cup cold water
- 1/4 cup soy sauce
- 1/4 cup rice vinegar
- 2 tablespoon honey
- 4 teaspoons sesame oil
- 4 teaspoons sugar
- 2 inch ginger, grated
- 2 garlic cloves, minced
- 1/2 cup gochujang
- oil for frying (I use peanut oil)

The Process
1. To make the batter combine the flour, egg whites, salt and water in a bowl and whisk together. You are looking for lines in the batter when the whisk passes through it. If it's too thin add more flour, too thick more water.
2. To make sauce combine soy, vinegar, honey, sesame oil, sugar, ginger, garlic and gochujang in a food processor and purree until smooth. Set aside.
3. Heat the oil until it reaches 350 degrees. Then take your chicken pieces, dunk in the batter, shake off excess then drop in batches into the fryer. Fry for 5 minutes and remove and set on paper towels. Repeat this until all the pieces have been once fried.
4. When the chicken is cool enough to handle, return the them in batches to the deep fryer and cook until they are nice and dark brown about 5 minutes. Repeat this for the other pieces.
5. Toss the chicken pieces in the sauce then serve with white rice.
6. Enjoy!

Tuesday, January 11, 2011

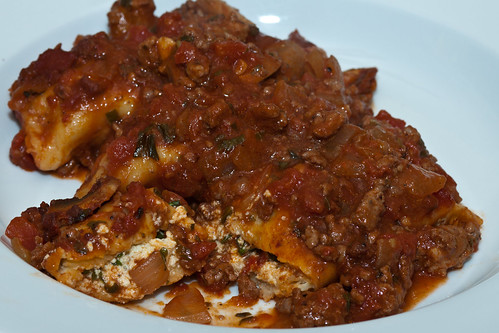
Manicotti

Manicotti All Done

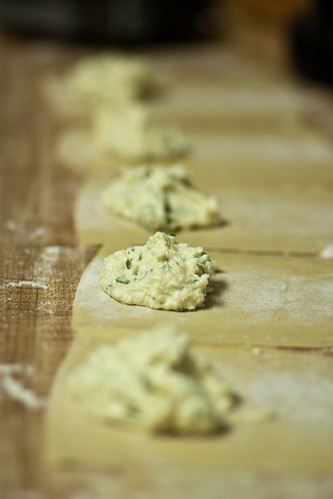
Manicotti Pre-Roll
Props to my wife for taking this shot.

So if you didn't know I got a pasta maker for my birthday so I have been making pasta like it's going out of style. However it's essentially been linguine and ravioli that's been concocted in my kitchen only. Then I saw something on Man vs. Food a couple of days ago where this dude took pasta sheets, cut them into squares and rolled a cheese filling into them essentially making manicotti. I immediately decided I am making these on Sunday. Hope you like them I know I did this filling was incredible.

Kitchen Notes
* You can use whatever kind of sauce you like I decided to use my bolognese which you can find here but use whatever you like.
* If you don't have access to fresh pasta just use the premade ones you can get at the store. Cook them according to the package instructions and fill them with the filling.
* If you are using fresh pasta don't worry about using the fresh pasta, it will cook in the sauce.

Ingredients
- 12 6 X 4 fresh pasta sheets I use the recipe that came with my pasta maker
- 1 15 ounce package of ricotta
- 1/2 cup parmesan cheese
- 2 eggs lightly beaten
- 1 cup shredded mozaralla cheese
- 2 tablespoons chopped basil
- salt and pepper
- 3 cups pasta sauce mine is above

The Process
1. Preheat your oven to 350 degrees. Combine the ricotta, parmesan, eggs, mozarella, basil and salt and pepper in a bowl and mix well. Take your pasta sheets and lay on a floured counter top. Divvy up the cheese mixture between the sheets then roll them up.
2. Take a large casserole dish and spray with pam then add a layer of your choice of sauce. Then place the manicotti's to the dish then cover with the rest of the sauce. Bake for 30 - 40 minutes or until you see bubbles coming from the center of the dish. Remove from the oven and dish up.
3. Enjoy!!!

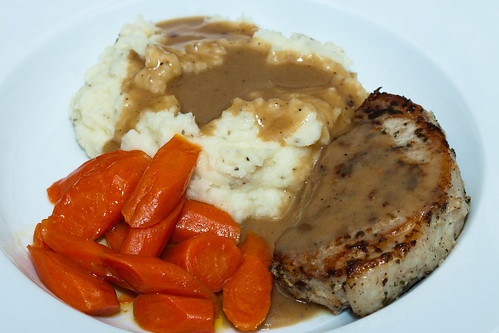
Sage Oil Pork Chops with Cauliflower Mashed Potatoes and Sweet Carrots

Sage Rubbed Pork Chops with Cauliflower Mashed Potatoes and Sweet Carrots

I was making my grocery list last week and like I do every time I go through what I have in the freezer and fridge to see what I have that I can use up. I found some pork chops that I cut from a loin in the freezer, sweet. Then I found some sage leftover from Thanksgiving in my crisper (which is weird that it lasted so long) so double sweet. I also had potatoes and carrots so it was definitely going to be pork chops, mashed potatoes and some form of carrots. Then I remembered that my friend at work said that cauliflower mashed potatoes were the business so I had to try them out. I mean an entire head of cauliflower is like 2 bucks so it was on, the meal had been established, time to get it done. So here's the recipe and if you have any quesitons please shoot me an email.

Kitchen Notes
* You can use whatever cut of pork you like I just happened to have 4 chops cut 1.5 inches thick so that's what I used.
* Makes 4 good sized servings.

Ingredients
- 1/4 cup olive oil
- 10 cloves garlic peeled
- 1/4 cup sage leaves
- kosher salt and fresh ground black pepper
- 4 pork chops
- 4 medium sized russet potatoes, peeled and cut into pieces
- 1 head of cauliflower cut into florets
- 1 and 1/2 sticks butter plus 2 tablespoons
- 1/4 cup brown sugar
- 6 carrots peeled and cut into 2 inch pieces
- 1/4 - 1/2 cup milk
- 1/2 cup Parmesan cheese
- 1 cup white wine
- 2 cups chicken stock
- corn starch and water combined to make a slurry

The Process
1. Combine the olive oil, 4 gloves of the garlic, sage leaves and some salt and pepper in a food processor or blender and puree until the sage is completely pasty. Place the pork chops in a dish and cover with the oil mixture making sure to coat both sides. Place in the fridge and marinate for 1 hour to over night turning occasionally.
2. Combine the potatoes, cauliflower and 6 remaining cloves of garlic in a pot and cover with water and bring to a boil. Also add the 1/2 stick of butter, the brown sugar, salt and the carrots to a pot over medium heat and cover. When they start simmering reduce heat to low and stir occasionally.
3. At the same time preheat the oven to 400 degrees. When the potatoes start boiling put the heat to a cast iron skillet on medium high. When the pan is not add the pork chops and brown on both sides until golden brown about 4 - 5 minutes. Remove the pork chops and put on a baking sheet and place in oven for 5 minutes to continue cooking. When time is up remove from oven and place on plate covered in foil. Add the 2 tablespoons of butter to the pan and allow to melt then deglaze with the wine and let reduce by half.
4. Hopefully now the potatoes are done you will know when you can cut through then with a butter knife. Strain the water off and return to the pan. Add the stick of butter and allow to melt. Then using a potato masher mash the starches. Then stir in the parmesan cheese and the milk until you get the consistency you need. Season with salt and pepper then cover and let sit.
5. When the wine is reduced add the 2 cups of stock and bring to a simmer. Whisk in the slurry and season with salt and pepper. Turn all the heat off and eat up.
6. Enjoy!

Still Baking

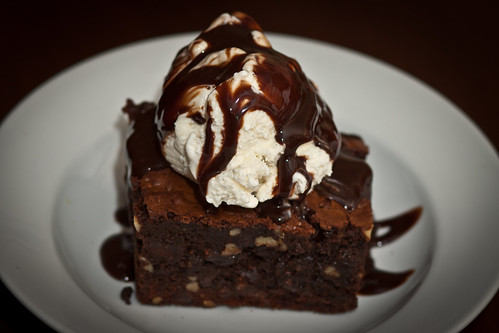
Brownie Sundae

Brownie Sundae

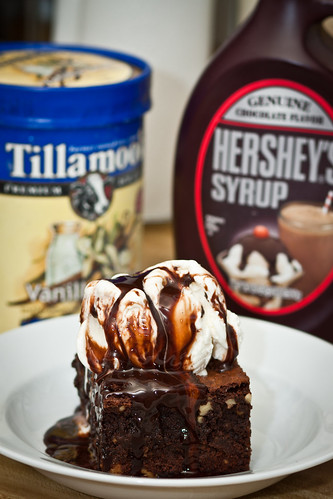
This being my first post of the year I figure I would make you all drool like crazy. So here I made a brownie sundae that was truly amazing. I used a Barefoot Contessa recipe that you can find here and she never disappoints. The brownies were chocolaty and filled with walnuts giving that perfect texture contrast. She also requires a little bit of ground coffee in it which I found to be a really nice touch. It wasn't overpowering but added a nice little zing. I used Tillamook vanilla bean ice cream and Hersey's chocolate syrup to complete this decadent desert. In retrospect I should have made or used hot fudge but it was still quit excellent. Just make sure your brownie is warm when you serve it because it's nice to have a warm brownie sundae. If you have any questions please let me know. Happy New Years!