Friday, February 25, 2011

Grilled Pasta

Grilled Pasta

Now I know what you are thinking, what is grilled pasta. I didn't actually grill the pasta but everything else that went with the pasta was grilled, thus the name. I didn't really have a recipe I was just winging it but it turned out really good. The sausage was tender, the veggies were sweet because of the grilling and it all went really awesomely with the pasta. I love the flavor you get from grilling and it accented this dish perfectly. I hope you all like it. If you have any questions please let me know.

Kitchen Notes
* You can use whatever kind of noodles you like. I used rotelle because that's what I had.
* You can use whatever kind of sausage you like as well just make sure they're the big ones not the little breakfast ones.
* For the veggies, you want them big enough so they don't fall through the grill, we will slice them after then come off the heat.
* Makes 4 servings.

Ingredients
- 5 to 6 sausages
- 1 large onion, sliced (think onion rings but don't take them apart)
- 1 red pepper, scored and seeded then cut into quarters
- 1 yellow pepper, scored and seeded then cut into quarters
- Olive oil
- 1 pound pasta
- 1/4 cup white wine
- 1/4 cup half and half
- 1/2 cup parmesan cheese grated
- Kosher salt and pepper

The Process
1. Heat your grill to high heat. Cover your veggies with the oil and when your grill is hot, add them to the grill along with the sausages. Cook until the sausages are done and the veggies have grill marks on both sides. Remove from heat.
2. While your veggies and sausages grill, cook the pasta. When they are done, slice the onion and peppers into strips and cut the sausages into bite sized pieces.
3. When the pasta is done, drain then return to the pan over medium high heat. Add the cut veggies and sausages then hit it with the wine. Cook until the wine evaporates then add the half and half and parmesan and stir until thickened. Turn off heat then season with salt and pepper.
4. Enjoy!

Caribbean Jerk Chicken with Coconut Rice

Jerk Chicken

You all know me, you know that I love to try new things and hopefully come up with a recipe that I can share with you. This is a recipe that I am pretty happy with. The flavors are deep and rich and the rice is soft and delicious and does a fantastic job of complementing the chicken. I hope you all like it and thanks for looking.

Kitchen Notes
* Based loosely off this recipe.
* If you aren't a fan of spicey food, they I would suggest using a jalapeno or crushed red pepper flakes in lue of the habenero.
* It's best to start the rice when you preheat the grill.
* Makes 4 servings

Ingredients
- 1 bunch green onions
- 2 cloves garlic, peeled
- 1 habenero, stem removed
- 1/2 onion, skin removed and roughly chopped
- 2 tablespoons sugar
- 1 teaspoon dried thyme
- 1 tablespoon ground allspice
- 1 tablespoon kosher salt
- 1/2 teaspoon ground nutmeg
- 1/2 teaspoon cinnamon
- 1/4 cup white vinegar
- 2 tablespoons soy sauce
- 2 tablespoons lime juice
- 1 blood orange, juiced
- 2 tablespoons vegetable oil
- 1/2 teaspoon freshly ground pepper
- 4 bone in, skin on chicken breasts

The Process
1. Combine all the ingredients other than the chicken in a blender or food processor and blend until smooth. Put the chicken in a plastic bag with the pureed mixture and toss well to make sure the chicken is completely covered. Place in fridge over night.
2. Heat a grill to medium high heat (about 400 degrees). Remove the chicken from the marinade then cook skin side down for 5 minutes or until the skin has a nice crust on it. Then cook the other side of the chicken for 5 minutes as well or until it has some nice grill marks on it.
3. Put the chicken on a rack above the grill or on a non heated side of the grill and let cook for an additional 10 minutes. This is important because if you leave it over the heat for that long it will burn.
4. Remove from heat and let rest for 5 minutes. Serve with coconut rise and fresh lime wedges.
5. Enjoy!


** Coconut Rice **
Ingredients

- 1 tablespoon olive oil
- 3 cloves garlic, minced
- 1/2 teaspoon red chili flakes
- 1 cup white rice (I used jasmine)
- 1/4 cup white wine
- 1 cup chicken stock
- 3/4 cup coconut milk (about half a can)
- 1 can black beans, drained
- kosher salt and freshly ground black pepper

The Process
1. Heat the olive oil in a pot over medium high heat. Add the garlic and pepper flakes and cook for one minute.
2. Add the rice and toast until you start to notice it turning color stirring often. Add the white wine and deglaze the pan.
3. Stir in the chicken stock and coconut milk and bring to a boil. Reduce heat to low and cook covered for about 20 minutes or until the rice is done. Turn off heat.
4. Stir in beans then season with salt and pepper.
5. Enjoy!

Thursday, February 17, 2011

Chicken Makhani (Indian Butter Chicken)

Chicken Makhani (Butter Chicken)

I have been experimenting with making Indian food as of late. If you didn't see a couple of weeks ago I make Chicken Tikki Masala and Naan bread with turned out really good. So I thought I would try something with boneless chicken chicken breast after I found this recipe for Butter Chicken. This was super easy to make and it tasted so good. I was really amazed as I was eating it just how tasty it was and not to mention how simple it was to create. This recipe is a mock up of this one from AllRecipes.com I just kind of changed some steps and added some marinading. I really hope you all like this and as always if you have questions, please let me know.

Kitchen Notes
* Garam Masala can be found in the specialty food section of your grocery store.
* Makes 4 servings
* To make the coconut rice just add a cup of coconut milk instead of water to your rice cooker with the 3 cups of rice and a little bit of salt.

Ingredients
- 4 boneless, skinless chicken breasts cut into 1 inch cubes
- 2 teaspoons garam masala
- 1/2 teaspoon cayenne pepper
- 2 tablespoons peanut oil
- 2 cloves garlic minced
- 1/2 inch fresh ginger grated
- 1 shallot minced
- 1/2 onion chopped
- 2 tablespoons butter
- 2 teaspoons lemon juice
- 1 teaspoon chili powder
- 1 teaspoon ground cumin
- 1 bay leaf
- 1 cup tomato sauce
- 1/4 cup plain yogurt
- 1 cup half-and-half
- 1/4 teaspoon cayenne pepper, or to taste
- 1 pinch salt
- 1 pinch black pepper
- 1 tablespoon peanut oil
- cornstarch and cold water combined to make a slurry

The Process
1. Combine chicken, 1 teaspoon of the garam masala and the cayenne pepper and let marinade in the fridge for 1 hour.
2. In a large work heat 1 tablespoon of the peanut oil over hight heat. Add the chicken and cook for about 8 minutes or until none of it is pink anymore. Drain the chicken in a colander. Wipe out the pan with a paper towel.
3. Return the wok to the heat and heat up the oil. Add the garlic, ginger, shallots and onion to the pan and cook for about 4 minutes or until the onions are turning translucent.
4. Stir in the butter, lemon juice, chili powder, cumin, the last teaspoon of the garam masala and the bay leaf and cook for about a minute longer than it takes the butter to melt.
5. Stir in the tomato sauce and cook for another 2 minutes. Stir in the yogurt, half and half and bring to a simmer.
6. Return the chicken to the work then season with the salt and pepper then add the cayenne pepper to your heat preference.
7. Simmer for 3 minutes then stir in the slurry to make it thicker. Simmer for 1 minute then remove from the heat.
8. Serve over coconut rice.
9. Enjoy!

Thai Cashew Chicken

Cashew Chicken

Who doesn't love Thai food? Every time I got to one of those places I try something new and I haven't been disappointed yet. That being said I do have my favorites and one of those is Cashew Chicken. This is without a doubt one of my favorite Thai stir frys. There's tons of veggies, the chicken is nice and tender and the sauce is killer. I know I didn't hit the nail on the head exactly but it was very tasty regardless. If you have any questions please let me know.

Kitchen Notes
* You can use whatever type of protein you like but chicken is my favorite.
* You can serve this with whatever you want but the best is white or brown rice.
* You can tone down the dried peppers if you don't like that much heat.
* The thick soy sauce can be found in the Asian section of your grocery store.
* If you can't find unsalted cashews just take salted ones then rinse them off.
* Makes 4 servings.

Ingredients
- 1/4 cup soy sauce
- 1/4 cup thick, sweet sauce
- 2 teaspoons fish sauce
- 2 teaspoons white sugar
- 1/2 cup chicken stock
- 2 tablespoons vegetable oil
- 4 boneless, skinless chicken breasts
- 10 dried red chilies diced
- 3 cloves garlic
- 1 inch ginger grated
- 1 onion diced
- 1 red pepper cored, seeded and diced
- 3 carrots peeled and sliced
- 1 bunch green onions, cut on the bias
- 1/4 cup unsalted cashews
- cornstarch and water combined to make a slurry

The Process
1. In a small mixing bowl combine the soy, sweet soy, fish sauce, sugar and chicken stock and mix well.
2. In a wok, heat 1 tablespoon of oil over high heat. Add the chicken and cook until it done about 6 minutes. Drain the chicken off and wipe out the pan with a paper towel.
3. Heat the remaining tablespoon of oil over high heat. Add the chilies, garlic and ginger and cook for 1 minute. Add the onion, red pepper and carrots and cook for about 4 minutes stirring frequently.
4. Return the chicken to the pan with the green onions, cashews and the sauce we made earlier. Cook for 2 minutes just to bring it all together.
5. Stir in the slurry just until it starts to thicken up. Bring back to a simmer then turn off the heat.
6. Serve over rice.
7. Enjoy!

Wednesday, February 16, 2011

French Onion Soup

French Onion Soup

This has always been one of those recipes I have shied away from because I figured it was insanely difficult to make but nothing could be further from the truth. It was super easy and the soup turned out crazy tasty. If you like soup then this is your recipe. If you have any questions please let me know and I would be happy to help you out.

Kitchen Notes
* You can use whatever cheese you would like. Fontina would be good as well.
* Makes 8 servings as an appetizer.
* Makes 4 servings as a meal.

Ingredients
- 1 stick butter
- 5 onions, sliced
- 3 cloves garlic, minced
- 2 bay leaves
- 1/2 cup red wine
- 2 10 ounce cans beef consomme
- 4 cups beef stock
- 1 packet french onion soup mix
- 1 loaf of french bread
- 1/2 pound gruyere cheese, grated
- kosher salt and papper

The Process
1. In a large pot over medium high heat, add the butter, onions, garlic and bay leaves and cook until nice and dark and reduced, about 25 minutes.
2. Deglaze the pan with the red wine and cook until the wine has reduced by half.
3. Add the consumme, beef stock and the soup mix and bring to a boil. Season with salt and pepper then simmer for 30 minutes on low.
4. Preheat your oven to 350 degrees. Sliced the bread and lay out on a sheet pan then cover each piece with the cheese. Cook until the cheese melts and gets some nice color on it. Remvoe from the oven.
5. To serve, place in bowls with a piece of the bread on top of the soup.
6. Enjoy!

Nanaimo Bars

Nanaimo Bars

During the day when I don't have anything to do I aimlessly wander foodie websites looking for new dishes and treats to make. When I came across this recipe for something called the Nanaimo Bars my minds started racing. I could have sworn I've had this before. So I sat there staring at it for about 5 minutes then it hit me, my Canadian family used to make these all the time. I then decided that yep, I'm making these almost because of some higher calling.

The recipe below is based off of Kita's post from Pass the Sushi and let me tell you she got it spot on they taste just like I remembered. They're super easy to make and require no baking just chilling. Make sure to let each layer chill before adding the next or it will all melt together and the results won't be as good as promised.

If you have any questions please feel free to contact me.

Ingre­di­ents

* Base *
- 1 egg
- 1/2 cup butter softened
- 1/4 cup sugar
- 1/3 cup cocoa
- 1 3/4 cups gra­ham cracker crumbs
- 3/4 cup coconut

* Fill­ing *
- 1/2 cup (one stick) but­ter, softened
- 3 tbs milk
- 1 tsp vanilla
- 2 tbs cus­tard pow­der or instant vanilla pud­ding mix
- 2 cups con­fec­tion­ers’ sugar

* Glaze *
- 3 tbs butter
- 3/4 cup semisweet choco­late chips

The Process
1. For the base: in a medium saucepan, combine the egg, butter, sugar and cocoa, stir well. Over medium how heat and stirring constantly, cook the mixture until it thickens. Remove from heat then mix in graham cracker crumbs and coconut. Press into a greased 8 inch square pan. Chill until cooled.
2. For the filling: In a mixing bowl, whisk together but­ter, milk, vanilla, cus­tard pow­der and con­fec­tion­ers’ sugar until light and fluffy. Spread evenly over base. Chill until cooled.
3. For the glaze: in a small saucepan over low heat, melt but­ter and choco­late chips. Let cool slightly. Pour evenly over fill­ing. Refrigerate until cooled.
4. Cut into 16 squares and enjoy! Store in the fridge.

Konicek Family Pictures

Konicek Family Pictures

Konicek Family Pictures

Konicek Family Pictures

Konicek Family Pictures

When I am asked to take pictures I am deeply honored to do so. I don't take it lightly because I know that when you are sharing the most important thing to you with someone else, that takes a lot of trust. So I try to keep it casual when we are shooting but I definitely take it seriously. This last weekend I got to shoot pics for our family's friend and her husband and their ridiculously cute daughter. I had a lot of fun and was amazed how the weather held out for us. Point Defiance in Tacoma is not just a zoo, there is a ton of cool backdrops to utilize. Love that place.

I think the pics turned out really well and I hope that the Koniceks are happy with them. I would love for some feedback from anyone if you have any. I am still learning so I really appreciate constructive criticism. Thanks for looking.

Direct Link

Wednesday, February 9, 2011

Chicken Gyros

Gyros

I am a huge fan of gyros I could honestly eat them everyday. I love how the meat if nice and flavorful, there's tons of veggies on them, the optional feta and of course that amazing tzatziki sauce makes for one of the most flavorful and filling things to eat out there. What would you classify them as? A sandwich? A wrap? Who knows. Well according to Wikipedia they are considered a sandwich so that pretty much settles it because the internet never lies.

Anyways these things are easier to make then you would think. Now because I don't have one of those awesome vertical broilers (the rotating spike thing) I decided to use chicken breasts. This sandwich is traditionally served with lamb but I like to experiment. They still turned out really amazing. So I hope you like this because I really did. If you have any questions please shoot me an email or comment.

Kitchen Notes
* I didn't peel my english cucumber because I wanted that extra crunch in my sauce but you can. If you aren't using english cucumber you should definitely peel it.
* You can use whatever type of meat you want but the chicken turned out really well.
* You can find pita bread anywhere these days all I recommend is using the ones that don't have the pocket in them.
* Greek yogurt is essential to this sauce. If you can't find it (which I doubt because I found it at safeway) then strain regular yogurts through a paper towel, through a strainer, into a bowl overnight in the fridge. Look here for a better explanation.
* Makes 4 gyros.

Ingredients
- 2 cups greek yogurt
- 1/4 cup lemon juice
- 1 tablespoon fresh dill, minced
- 3 cloves garlic, minced
- 1 english cucumber, cut in half, seeded, then diced small
- kosher salt and fresh ground black pepper
- 3 to 4 chicken breasts
- 1 tablespoon greek seasoning
- 1 tablespoon olive oil
- 4 pitas
- 1/2 red onion, sliced thin
- romaine lettuce shredded
- 2 roma tomatoes, sliced thin
- crumbled feta cheese

The Process
1. Combine the yogurt, lemon juice, dill, garlic and cucumber in a bowl and stir well to combine. Season with salt and pepper then place in the fridge for 1 hour to overnight. Don't worry if it tastes yogurty the lemon juice will break that down. When done reseason if necessary.
2. Preheat oven to 400 degrees. Season the chicken breasts with the greek seasoning. In a cast iron skillet, bring the oil to medium high heat. When the oil is hot add the chicken breasts and sear on both sides for 6 minutes. Then place in the oven for 10 minutes to finish cooking.
3. Heat your pitas in the oven until slightly warm. Get all your other veggies ready while waiting for the chicken to be done.
4. Remove the chicken and allow to rest on a cutting board for 5 minutes. Slice the chicken as thinly as you can.
5. To make a sandwich, take a piece of pita bread and lay it flat on a plate. Then add a few scoops of tzatziki sauce (about 3 - 4 large ones). Then place some chicken down on top of the sauce. Then cover with onions, lettuce, tomatoes then sprinkle some feta on top. Top with more tzatziki sauce if you wish. Roll up as best as you can.
6. Enjoy!

Wednesday, February 2, 2011

Chicken Tikki Masala with Turmeric Rice and homemade Naan Bread

Chicken Tikki Masala

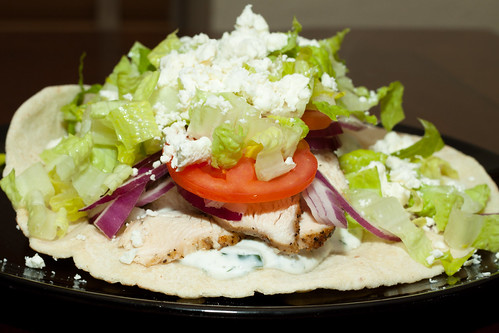
My Indian food knowledge is pretty low and I am not ashamed to admit it. They have to use more spices that any genre of food out there and it's pretty crazy. The only thing I really know how to make is curry even though it's really good, doesn't even begin to scratch the surface of their cuisine. So in my daily Tastespotting.com searching I found this recipe for chiken tikki masala and it looked pretty good. It calls for an ingredient called garam masala which basically means hot mixture and contains all these wonderful spices like cinnamon, cardamom, cumin, nutmeg, pepper, anise and cloves.

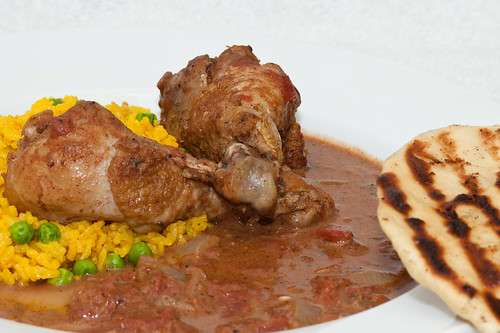
So if you are looking for something unique then this is the dish for you. The rice is interesting but when you mix it with the braising liquid from the chicken it's insanely good. Not to mention the homemade naan bread might be the best thing I have ever made. Now all this takes a lot of time and should be a Sunday dinner. I took the original recipe and modified it a little bit and I was really happy with the result. If you have any questions or need some pointers please let me know.

Kitchen Notes
* Garam masala can be found in specialty grocery stores, just ask around.
* You can use chicken breasts, thighs or whatever you want for this dish.
* Cayenne powder is optional but add it if you want some heat.
* As soon as you put the lid on the chicken, start the rice.
* The Naan bread can be made ahead of time then warmed up in the oven later.
* If you don't want to use naan bread then you can find it or something similar at your local grocery store such as pita bread.
* Makes 4 big servings.


** Chicken Tikki Masala **
Ingredients

- 8 - 10 chicken legs Chicken Breasts
- 1 teaspoon coriander
- 1 teaspoon cumin
- 1 tablespoon vegetable oil
- 1/2 cup plain yogurt
- 2 Tbsp butter
- 1 large onion diced
- 4 cloves garlic minced
- 1 2 inch piece ginger, minced or grated
- 3 Tbsp garam masala
- 1 28 ounce can diced tomatoes
- 1 tablespoon Sugar
- 1 teaspoon cayenne pepper (optional)
- 1/2 cup Heavy Cream
- Kosher salt for seasoning

The Process
1. Season the chicken with the coriander, cumin and some kosher salt. Then heat a large pot over medium high heat and add the oil. Then add the chicken pieces and brown on all sides. Remove from pan as they get completely browned and set on a plate.
2. Add the 2 tablespoons of butter to the pan. Then add the onion and saute for 4 minutes making sure to scrape up all the pieces from the bottom. Add the ginger and garlic and stir to combine then cook for 2 more minutes.
3. Add the garam masala, tomatoes, sugar, optional cayenne and stir together and bring to a simmer and then add the cream. Season with salt then add the chicken pieces to the pot and make sure to cover them with as much sauce as you can.
4. Turn heat down to low, put a lid on it and simmer for 1 hour stirring occasionally.
5. Serve with turmeric rice and fresh naan bread (both recipes below).
6 Enjoy!


** Turmeric Rice **
Ingredients
- 2 cups jasmine rice
- 1/2 stick butter, melted
- kosher salt
- 1 tablespoon turmeric
- 4 cups chicken stock
- 1 cup frozen peas

The Process
1. Combine all ingredients except the peas in a rice cooker and cook until it pops. Add the peas and close the lid for 5 minutes. Season with kosher salt.
2. Enjoy!


** Naan Bread **
Ingredients

- 1 packet or 2 1/4 teaspoons active yeast
- 1 cup warm water
- 1/4 cup white sugar, divided
- 3 tablespoons warm milk
- 1 egg beaten
- 2 teaspoons kosher salt plus more for seasoning
- 3 - 4 cups bread flour plus more for dusting
- 4 cloves garlic minced
- 1 stick butter, melted

The Process
1. In the bowl of your stand mixer, add the water and 1 tablespoon of the sugar then sprinkle in the yeast. Let stand for 10 minutes.
2. Put the bowl on in the mixer with the dough hook attachment. Add the rest of the sugar, milk, egg and salt then turn it on low. Slowly add three cups of the flour to the dough then turn the speed up to medium low and let mix for 6 - 8 minutes. If the dough seems really doughy, then add more flour. If it's really dry add a little more water. You want it to look like a pizza dough ball. Remove from the stand mixer and place in an oiled bowl covered with a damp towel for 1 hour.
3. Punch the dough down and roll out onto a floured counter top. Cut with a pizza cutter into even sized portions then roll into balls. Set on a oiled baking sheet at least 2 inches from each other and cover with the same towel for 30 minutes.
4. Take each ball on a floured counter top and roll into a thin circle. Place in a stack on plate. Now you're ready to cook them. Combine your butter and garlic too.
5. Preheat a grill or grill pan to medium. Oil the grill and add the dough circles. Brush the uncooked side with the butter and when the bottom is done, about 2 minutes, flip them (you will see little bubbles popping up all over). Brush the other side with the butter and a sprinkle of salt. Cook for another 2 minutes or until you get some good grill marks on them. Remove from the heat and place on a plate covered with a towel to keep warm or in the oven on low.
6. Repeat until all circles are cooked.
7. Enjoy!